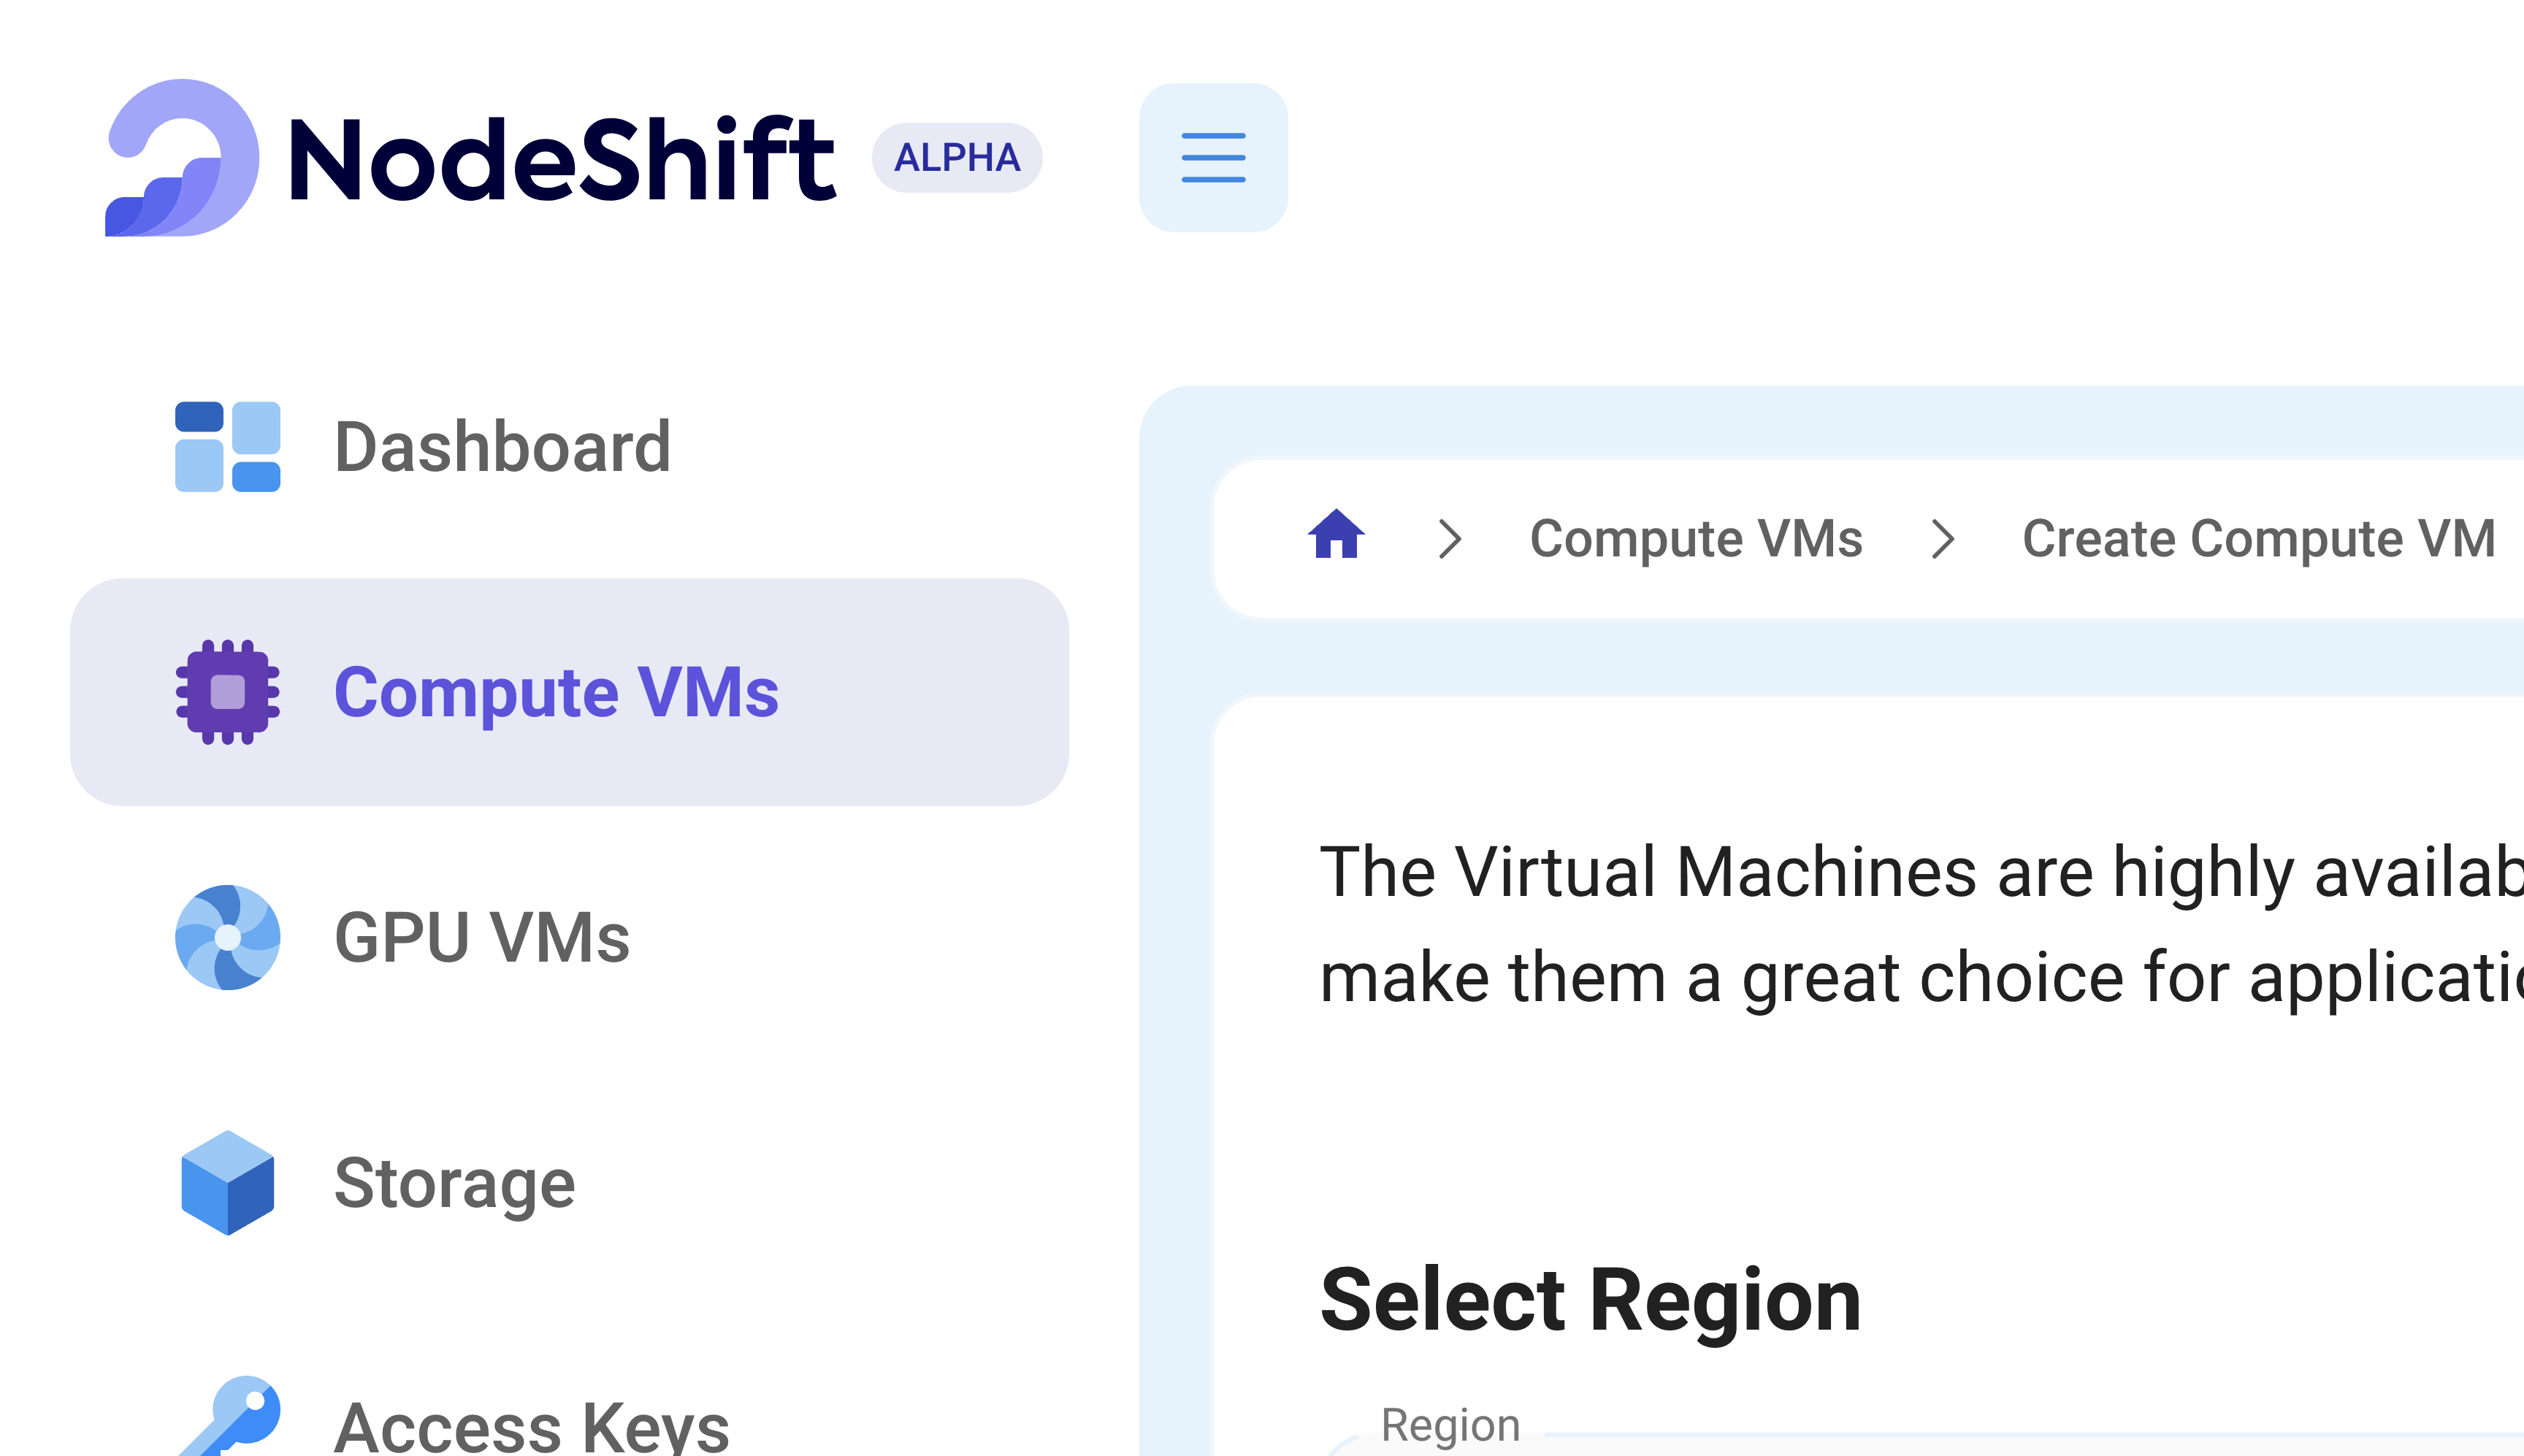
Create a Compute Virtual Machine
Compute VMs are NodeShift-powered Virtual Machines running Windows and Linux OS of your choice, the VMs are available with a wide range of CPU and RAM configurations for all possible application needs.
Create a Deployment in the Dashboard
In order to create a Compute VM in NodeShift, you need to first sign up for an account. Log into the account and from the dashboard, navigate to the menu on the left side and select the Compute VMs option, after which choose ‘Create Deployment’.
Select Region
Choose a VM location based on your product’s requirements such as a region which is closest to your users and you. In order to visualise all of the available geographical regions, access the geographical availability page.
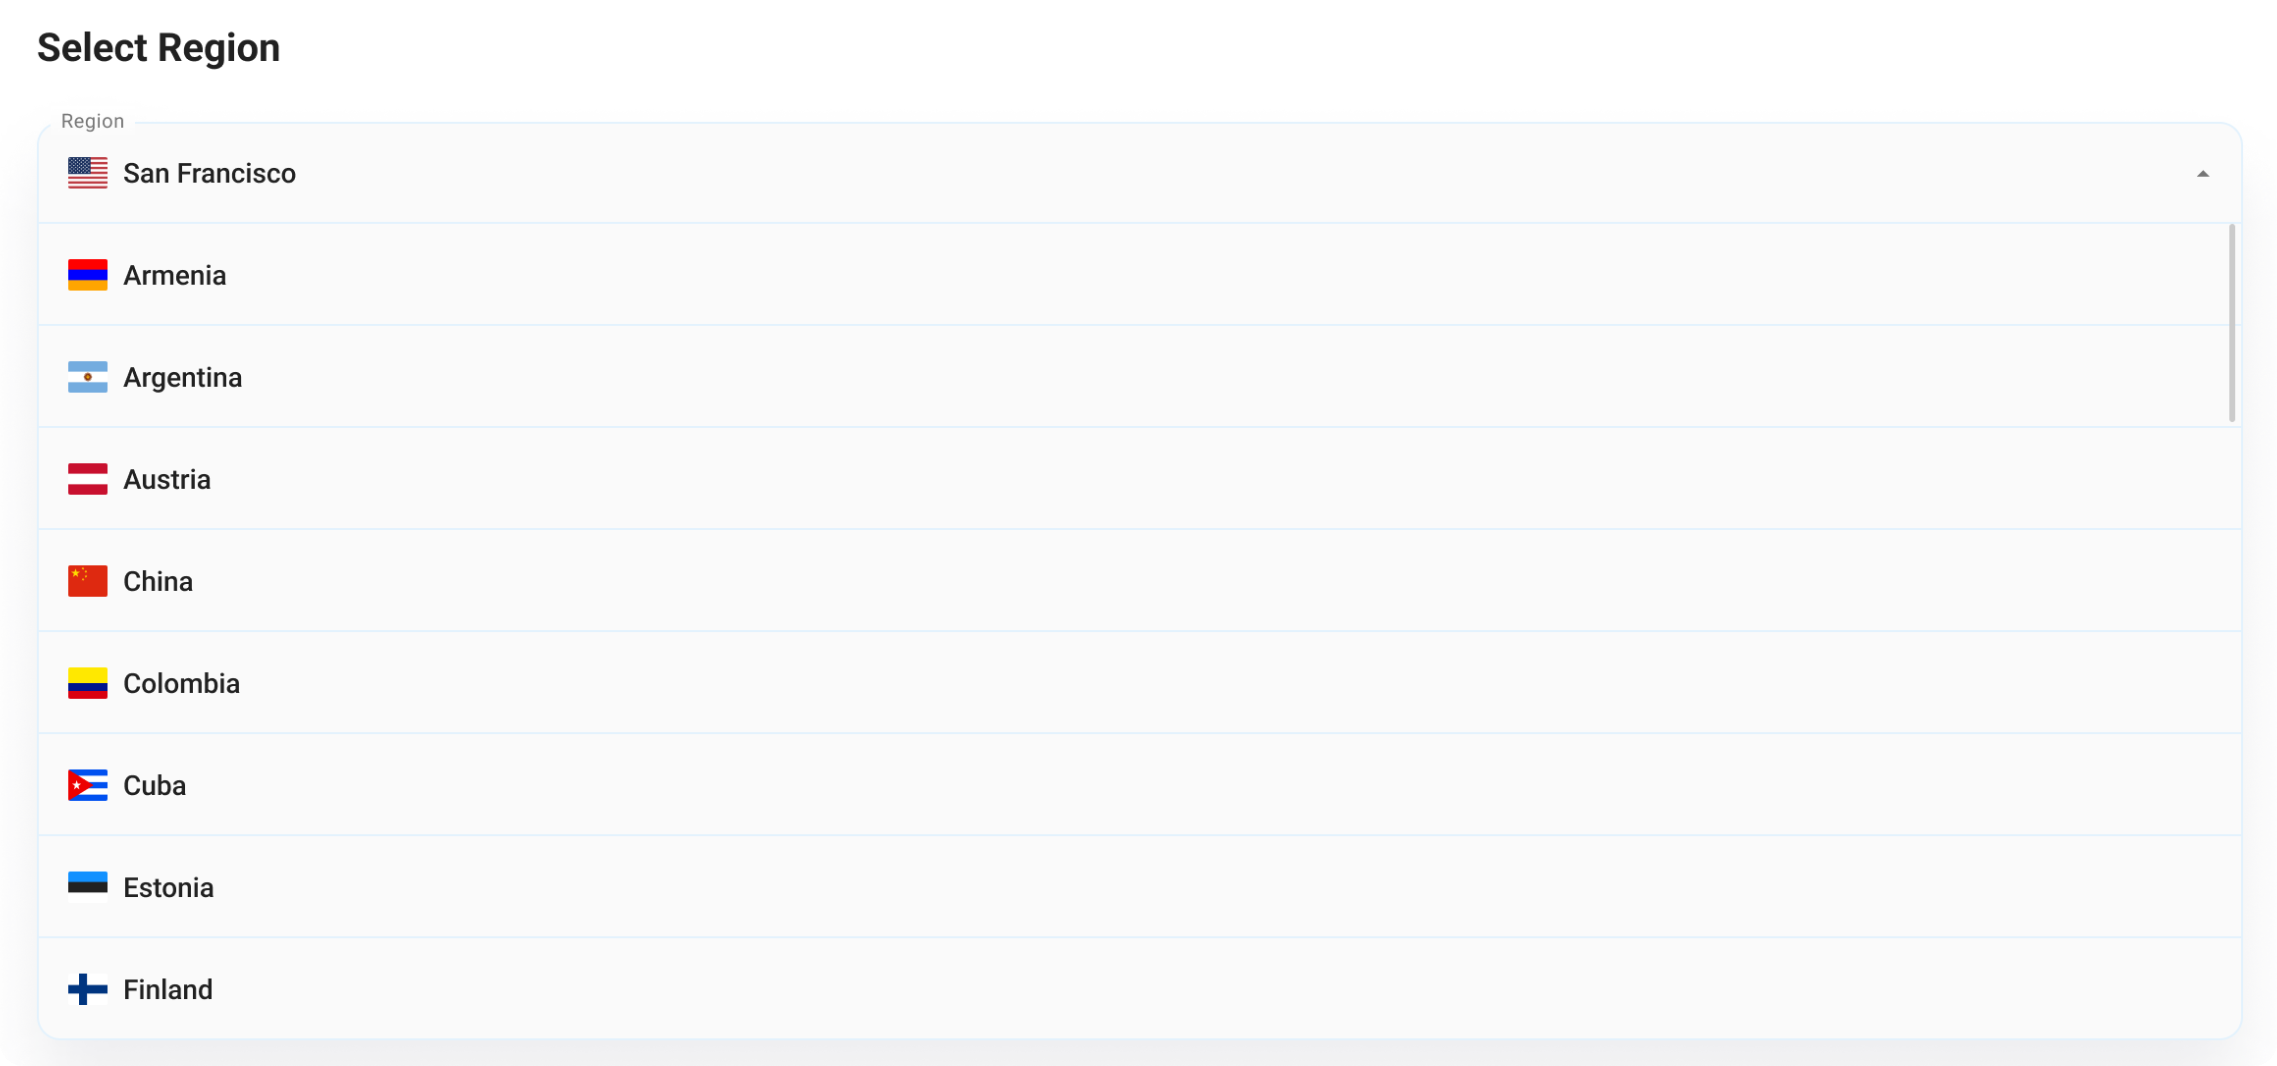
Additionally, in this section you can also choose a Virtual Private Cloud (VPC) network in which you would like to deploy your VM; however, if no VPCs are available and the VPC choice step is skipped, a default VPC will be allocated to the VM. The VPC ensures enhanced security by establishing an isolated connection between VM resources.
Choose an Image
The ‘Choose an Image’ section allows you to select an image for the Virtual Machine that you will deploy.

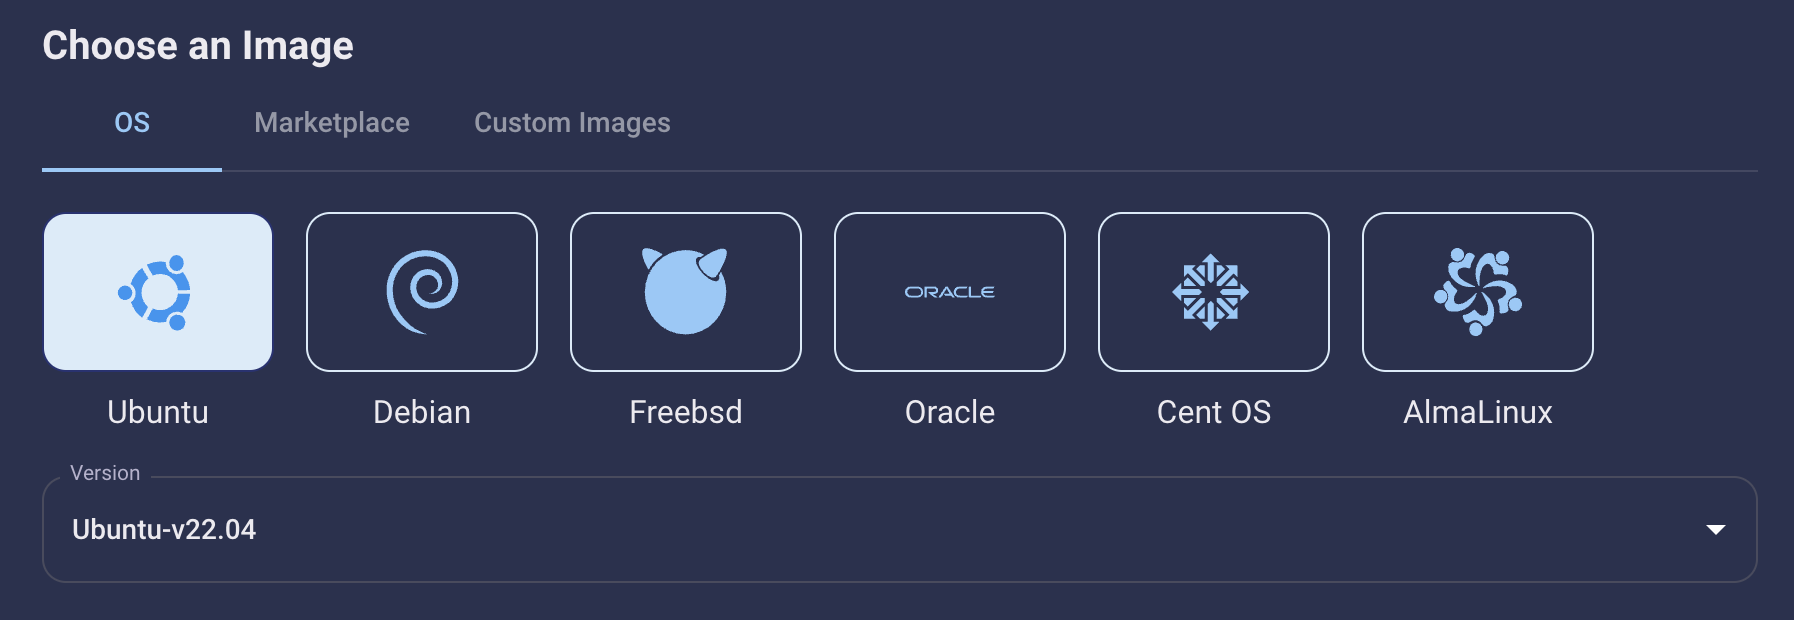
There are three different types of images that are available for Deployments:
-
OS are the foundational Unix images that contain no additional software, including operating systems such as Ubuntu, Fedora, CentOS and many more.
-
The Marketplace allows you to choose from a wide list of pre-built and pre-configured images ranging from Docker applications all the way to Wordpress.
-
Customer images are Docker images of your choice that you can directly deploy when first spinning up your Virtual Machine.
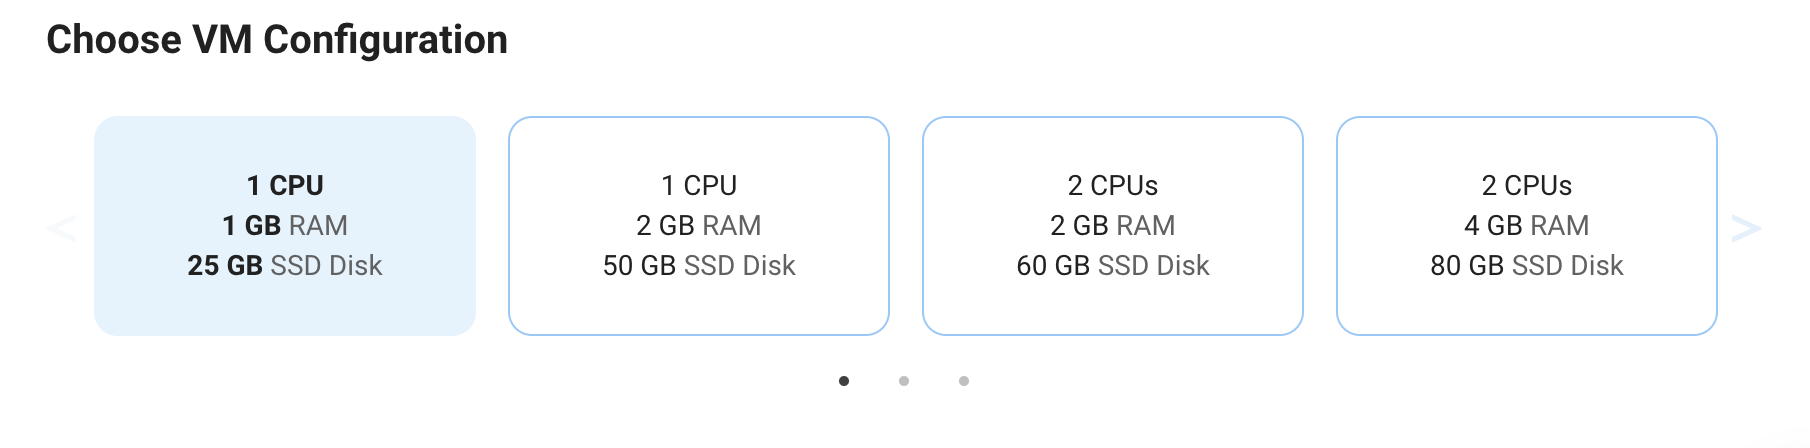
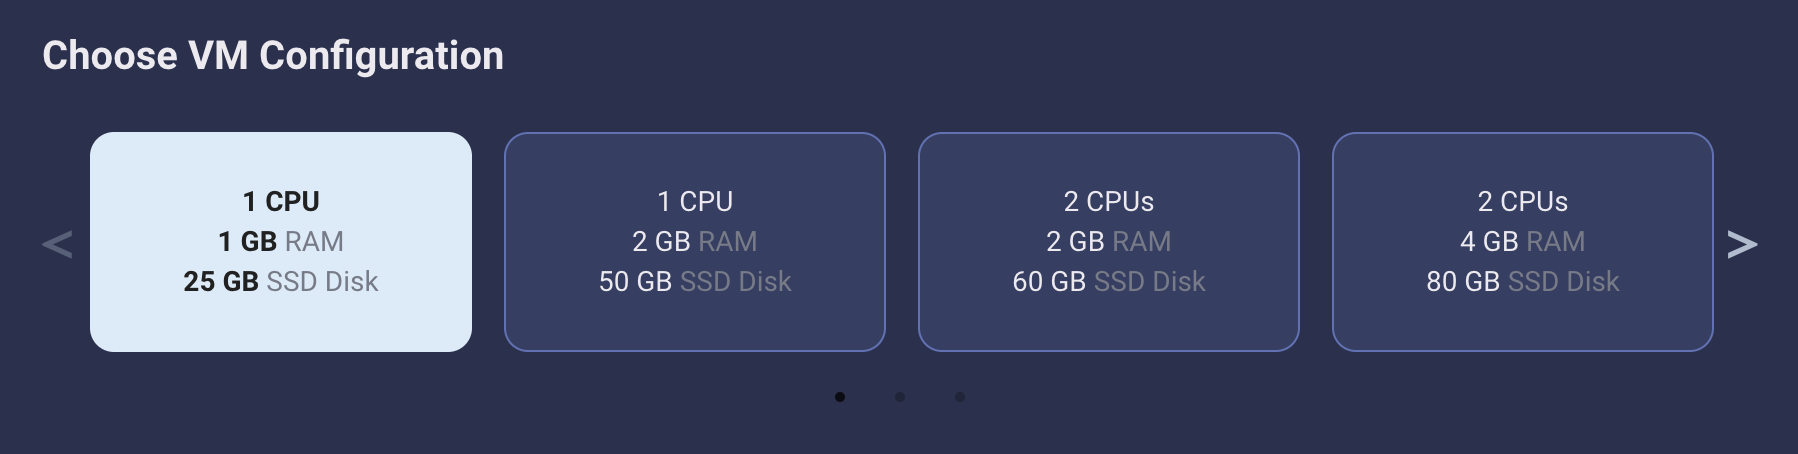
Choose VM Configuration
The ‘Choose VM Configuration' section allows you to configure the amount RAM, CPU cores and storage attached to your Compute VM.
The price of the chosen configuration will be available at bottom of the page prior to payment.
Select Authentication Methods
The ‘Authentication Method’ section enables you to choose how you would like to connect to your Virtual Machine once it is deployed.
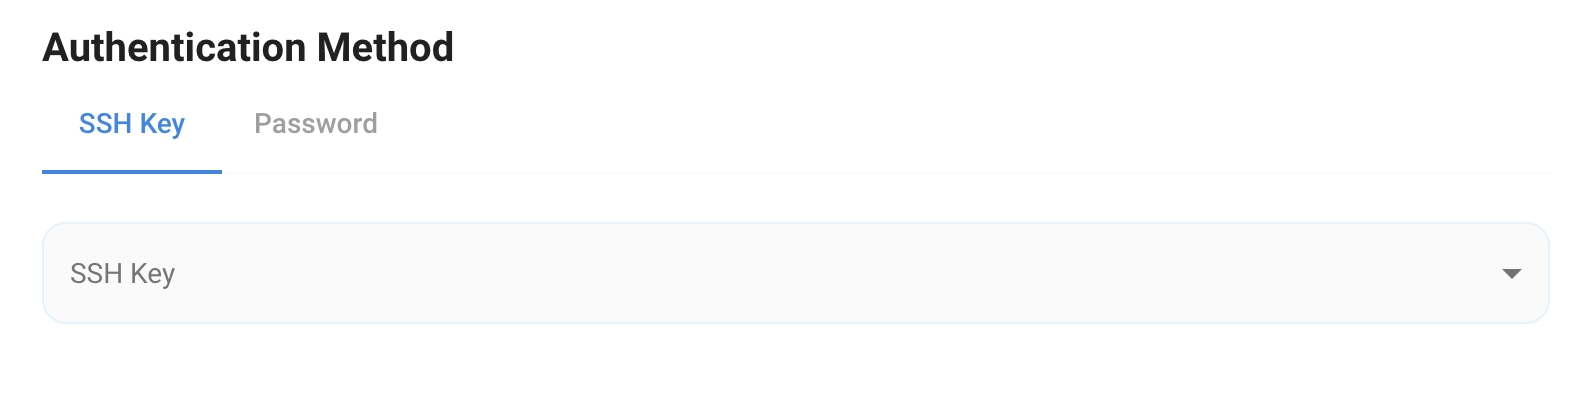
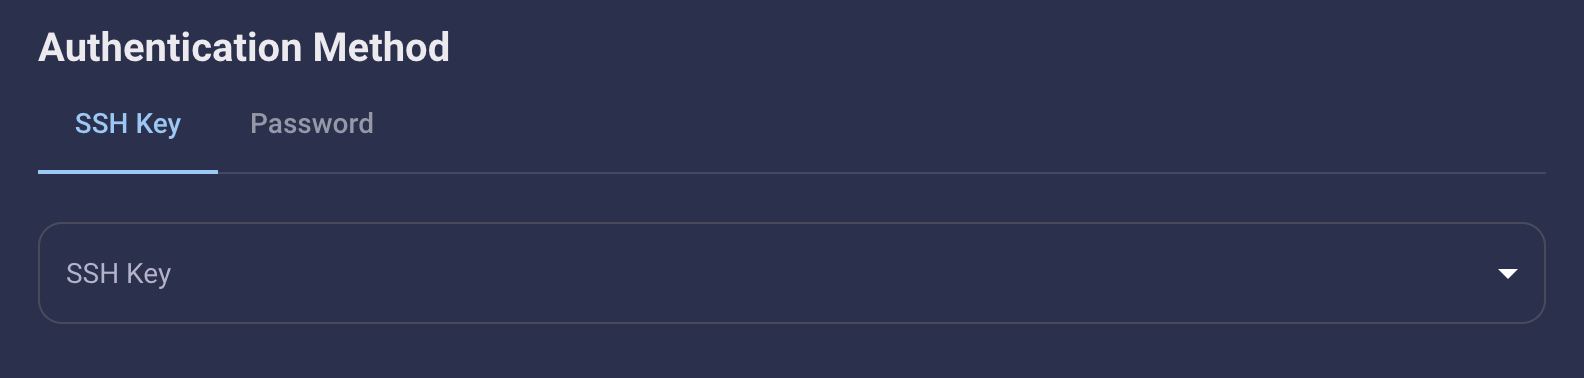
There are two authentication options available when connecting to a NodeShift VM:
-
Password - enables you to set up a password for your Deployment.
-
SSH Key - a more secure protocol used as the primary method of connecting to Linux servers remotely.
Additional Details
The ‘Finalize Details' section allows the user to configure additional aspects of the Virtual Machine.


The additional details options are:
-
Quantity - allows you to specify how many Compute VMs with the selected configuration you would like to deploy.
-
Hostname - a name for your chosen Compute VM.
-
Tags - an efficient way of structuring your cloud resources to ensure that it is easy to find the relevant resources allocated to a specific project you are working on.
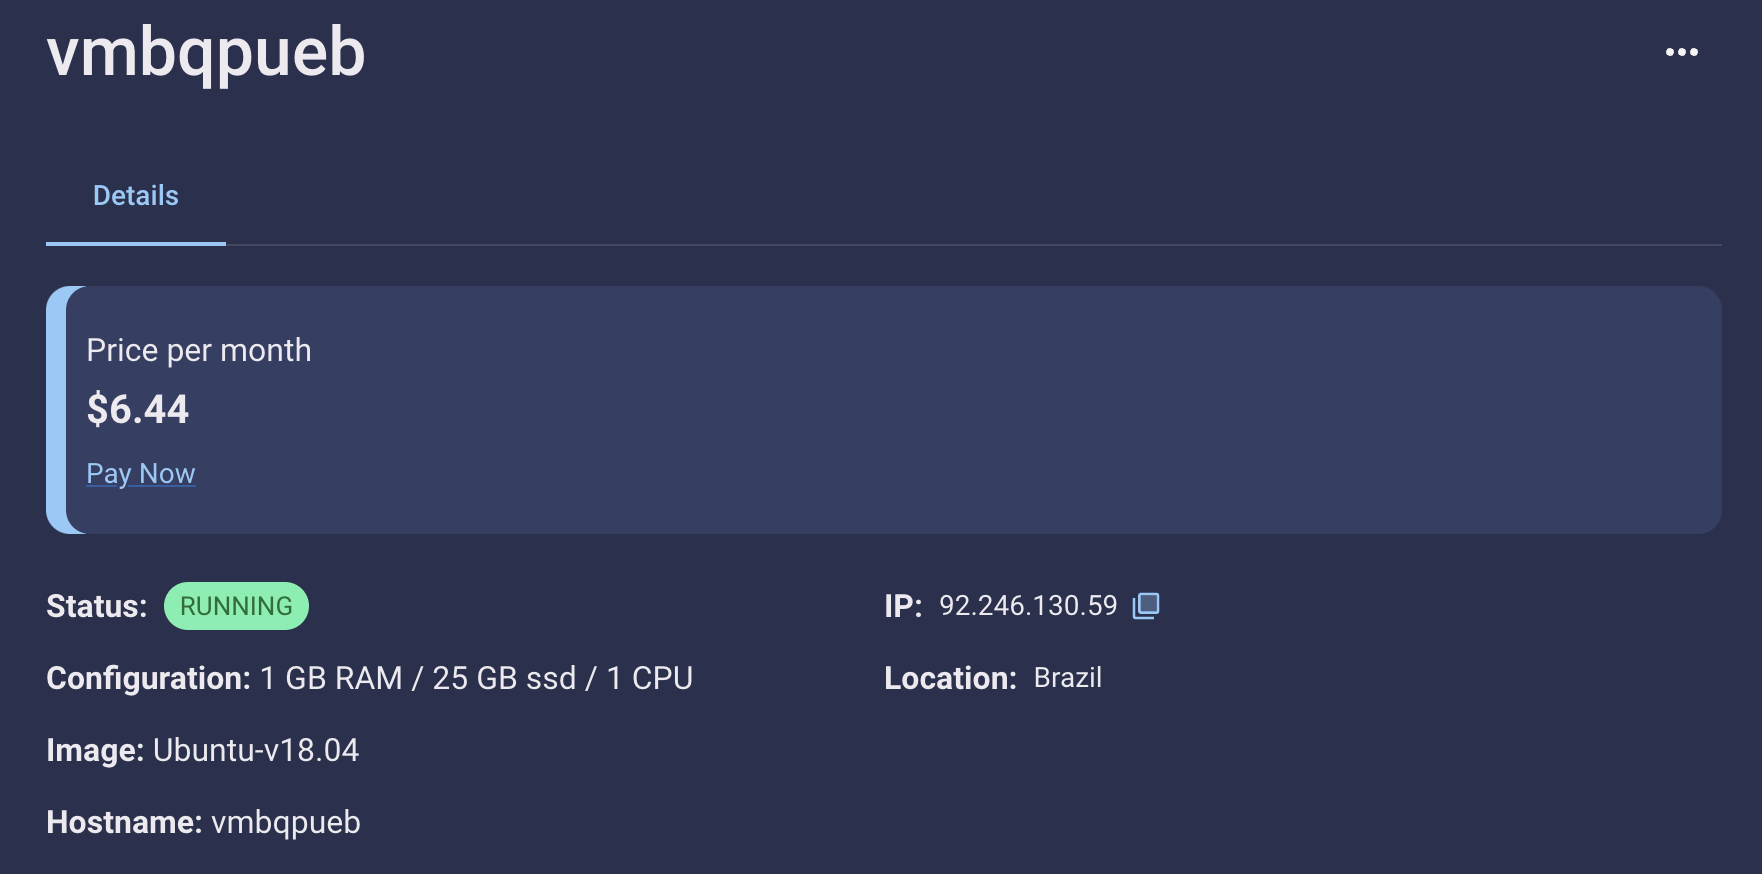
Deployment Completed
After your Compute VM deployment process is completed, you are taken to the page of your Virtual Machine where you can find all the relevant information with regards to its cost, configurations and how to connect to it.
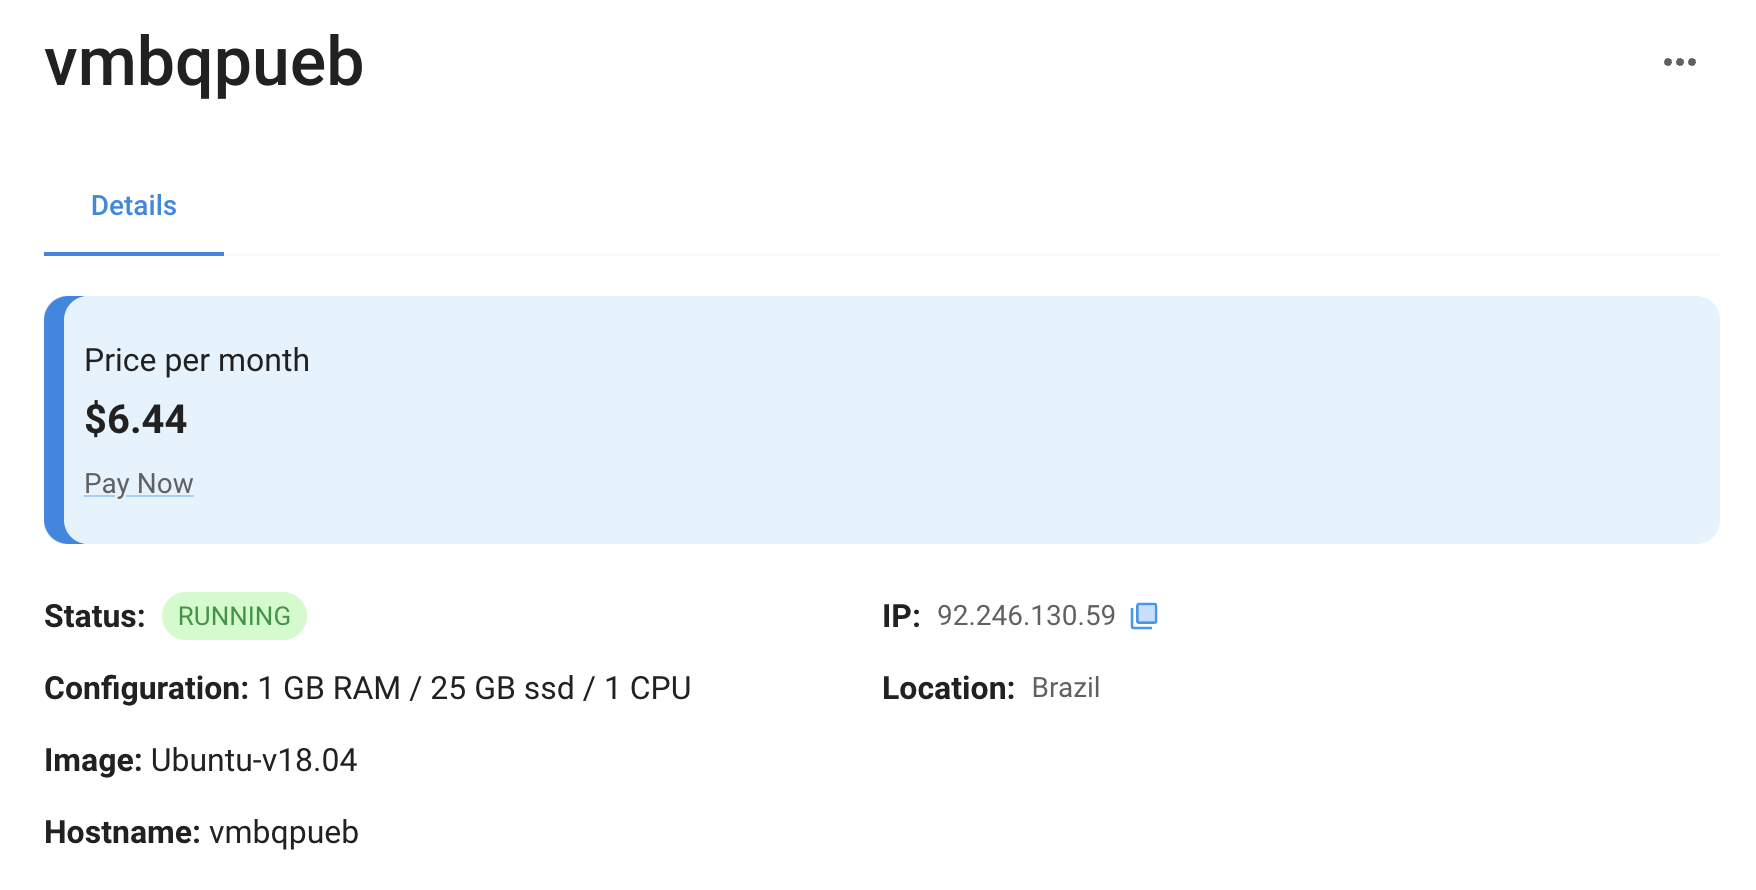
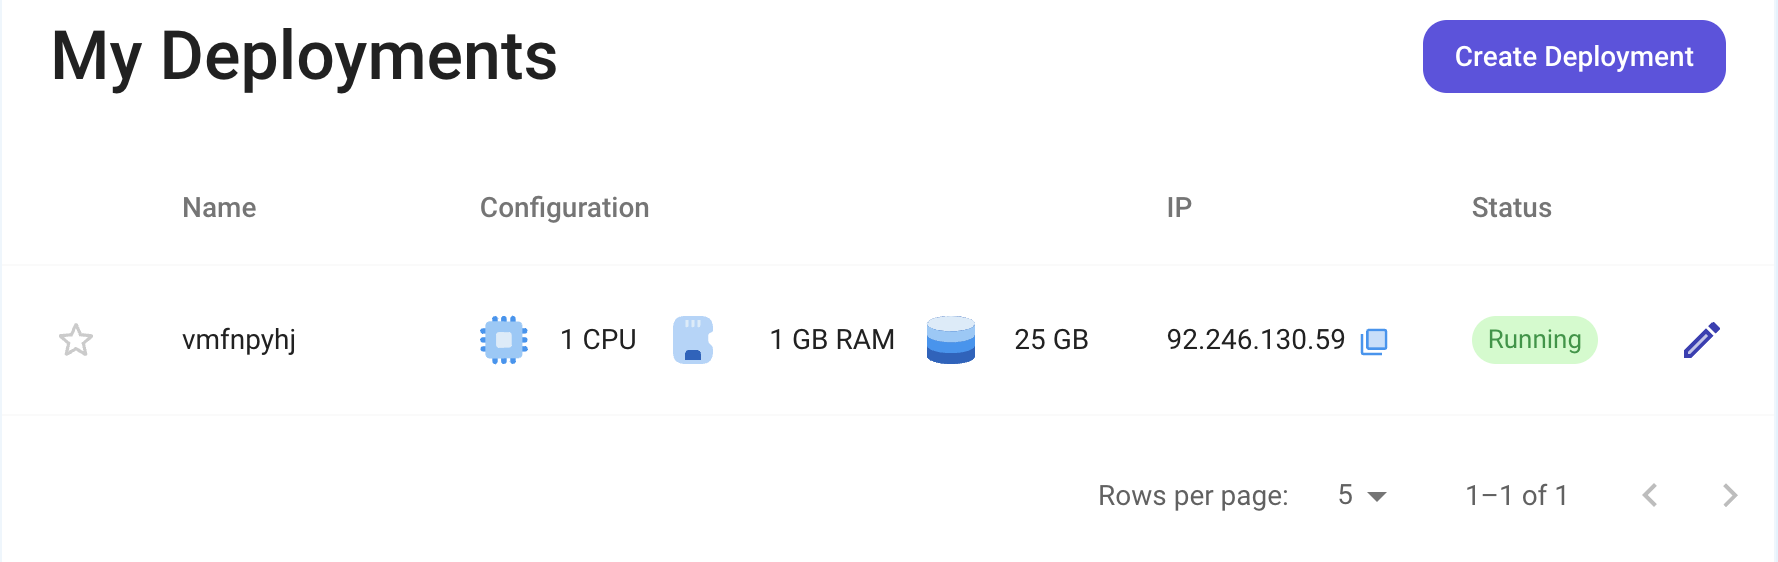
The page of the Compute that you created also allows you to mount additional storage, to edit the name of the deployment and to destroy the Virtual Machine. In order to access the page of your deployed Virtual Machine after it has been created, navigate to the ‘Compute VMs’ page in the menu where you will be able to see the list of all the Virtual Machines that are in the status of ‘running’ and ‘deploying’.

For more information on how billing and pricing works for NodeShift Compute VMs access the Billing page documentation.
Stopping a running machine
When a unit is in the "running" status, you can temporarily stop it. To do this, go to the Compute VM list, open the options dropdown, and select "Stop."
This action will pause the unit, but it will continue to incur charges while paused.
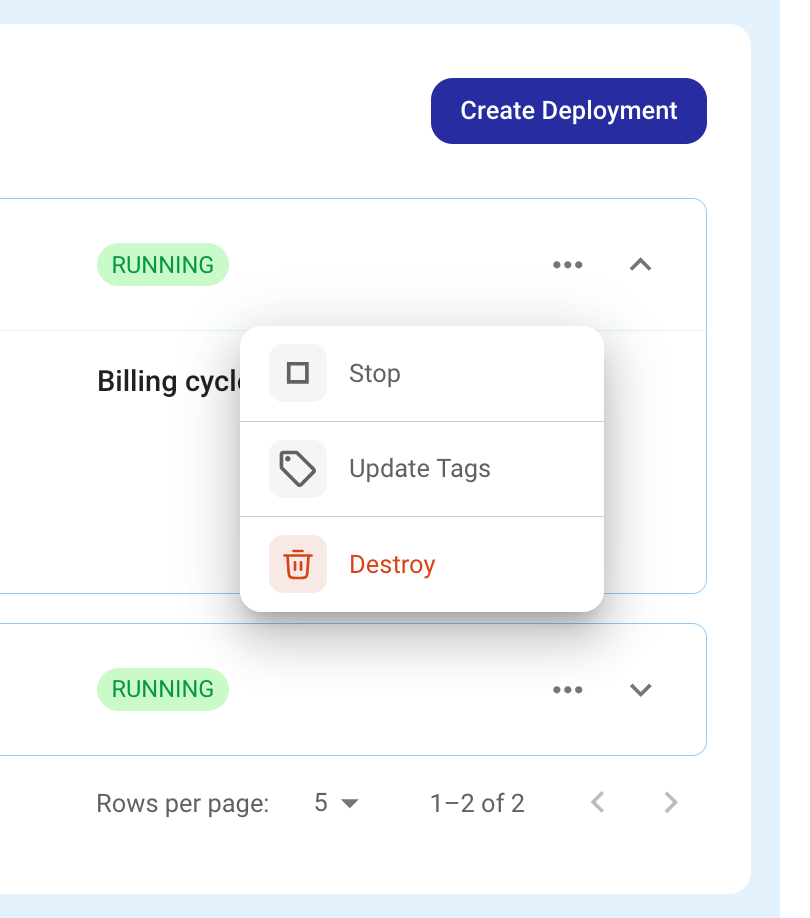

To resume the unit's activity, click "Start" in the same dropdown. After a short while, the unit will return to operation.