VPC Management
NodeShift Virtual Private Clouds (VPCs) provide robust security by creating a protected network environment for your Virtual Machines (VMs), ensuring that your resources are isolated from the public internet and other VPCs. This advanced security model helps safeguard sensitive data and resources from unauthorized access and potential cyber threats.
Getting Started with Your First VPC
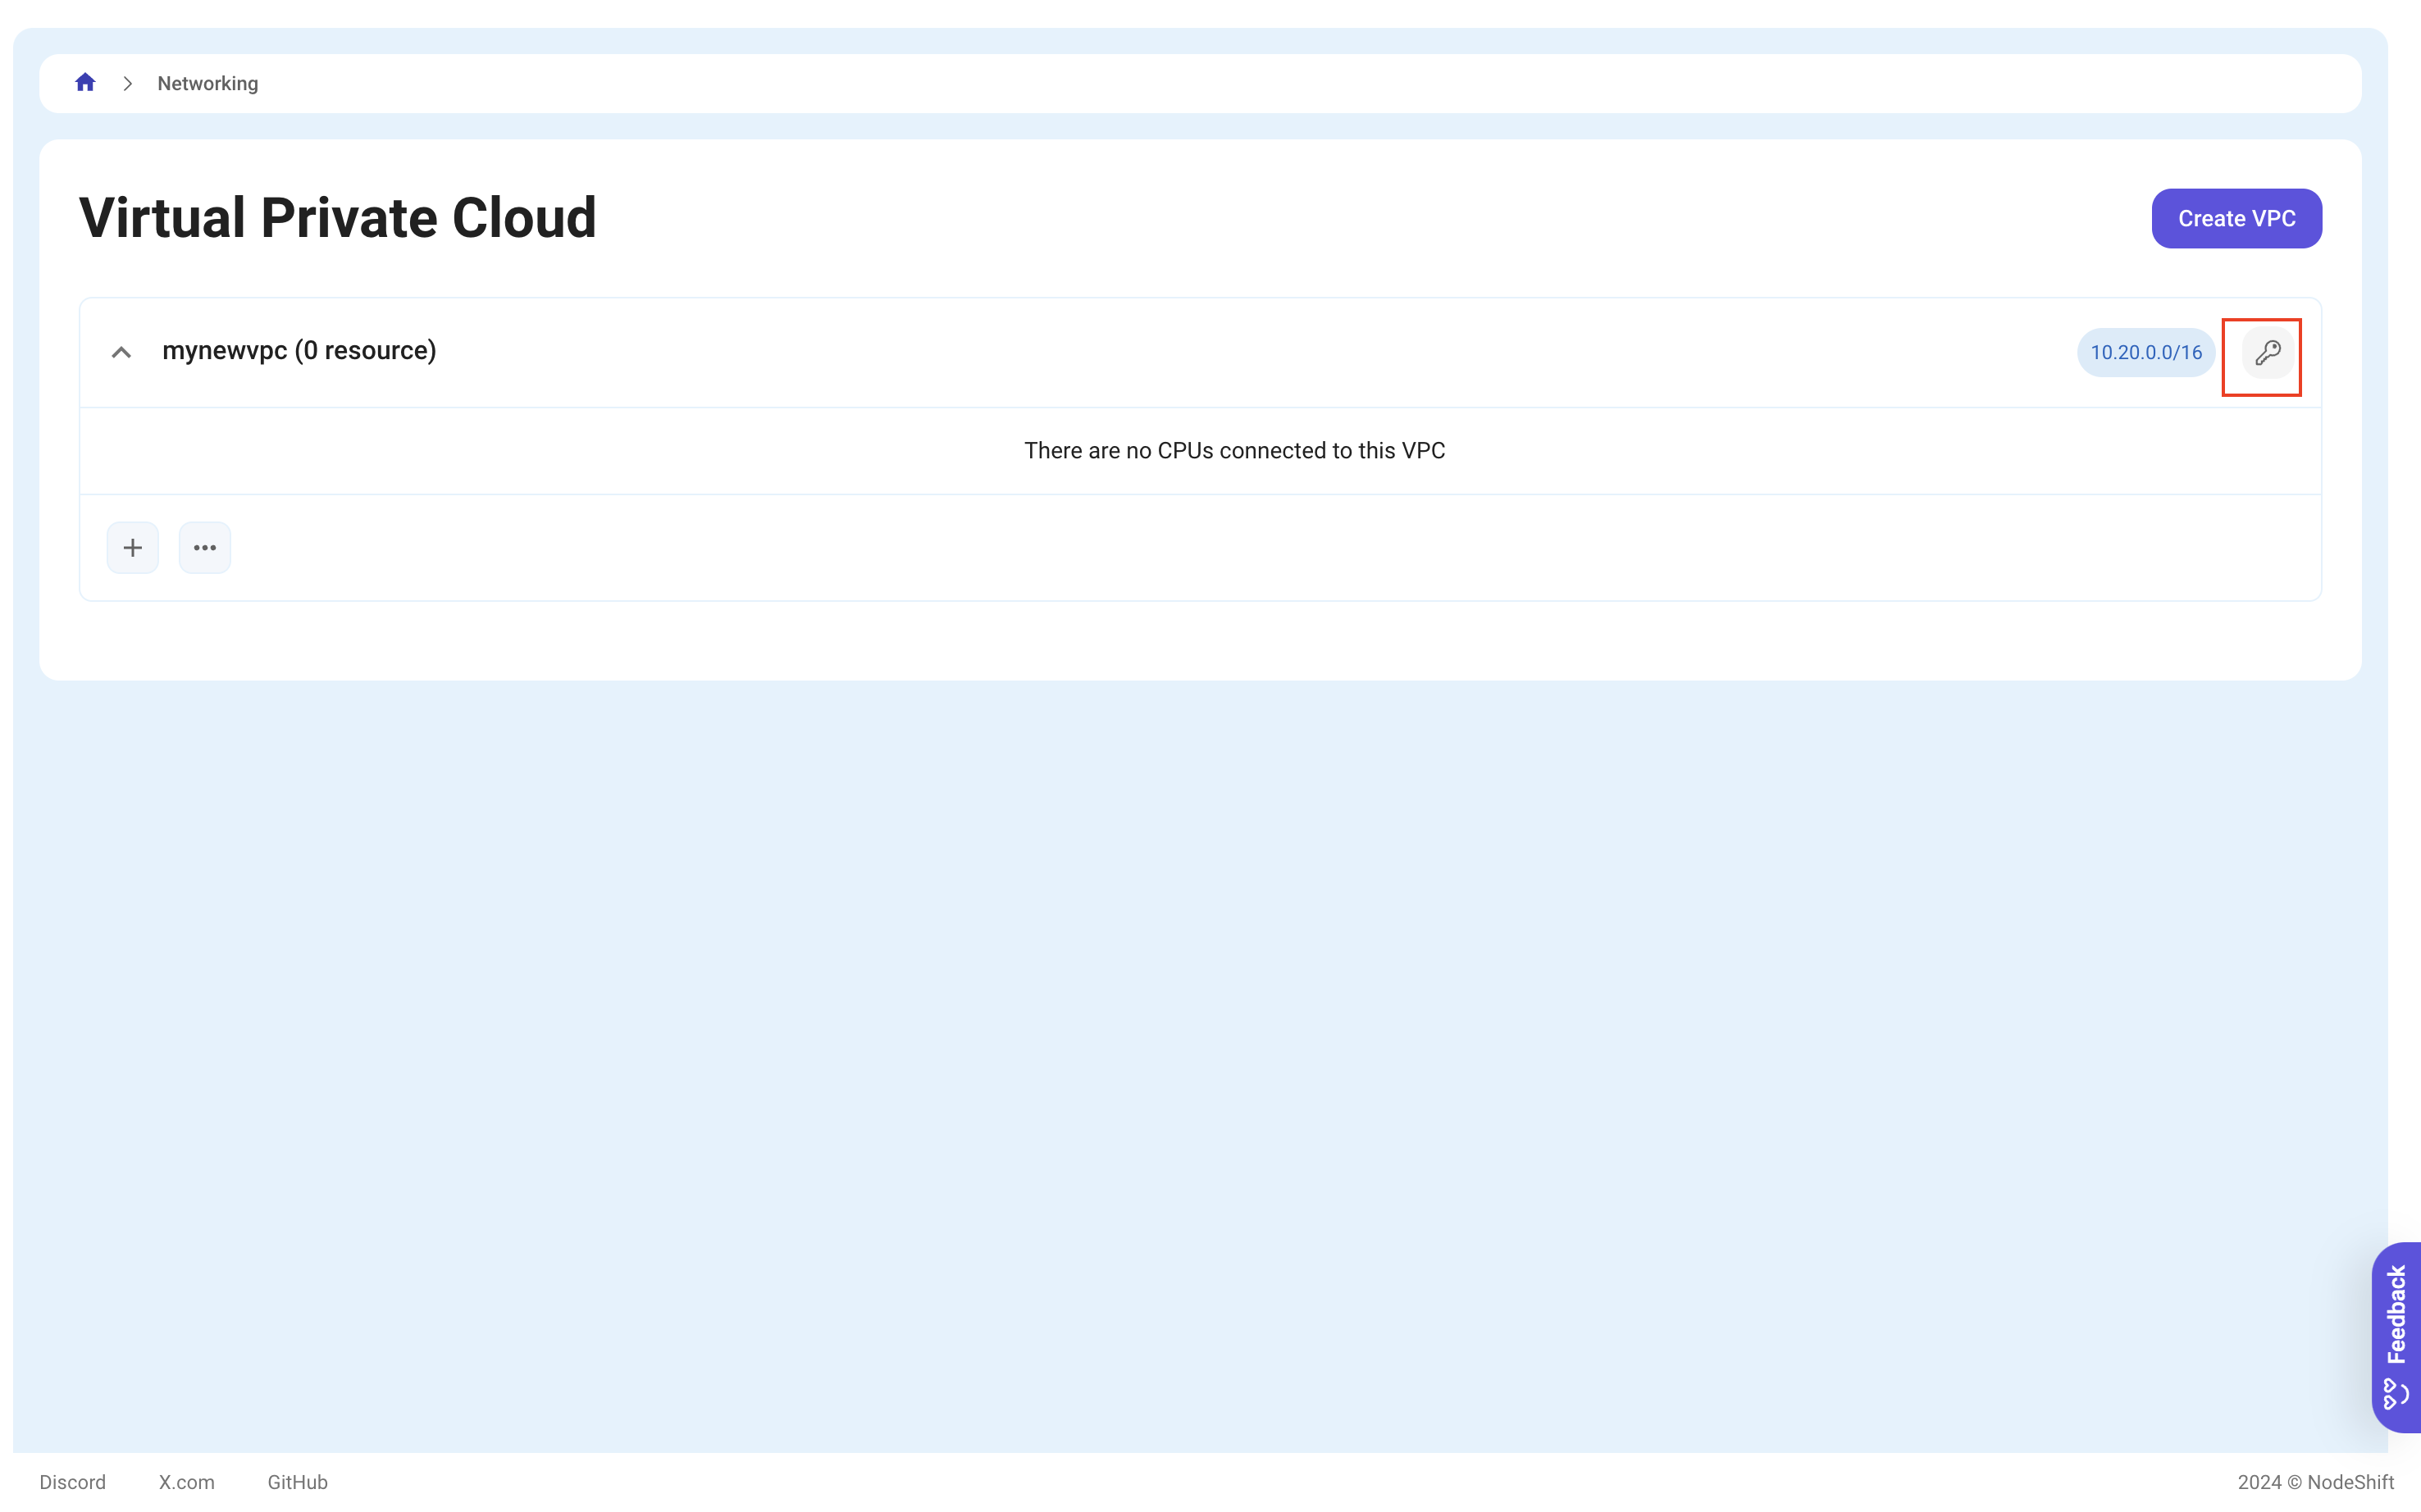
When you create your first VPC, the initial setup may take approximately two minutes. However, subsequent VPC creations are processed instantly. Once your newly created VPC appears in the list, you can proceed by selecting the key icon located on the right side of the VPC item.
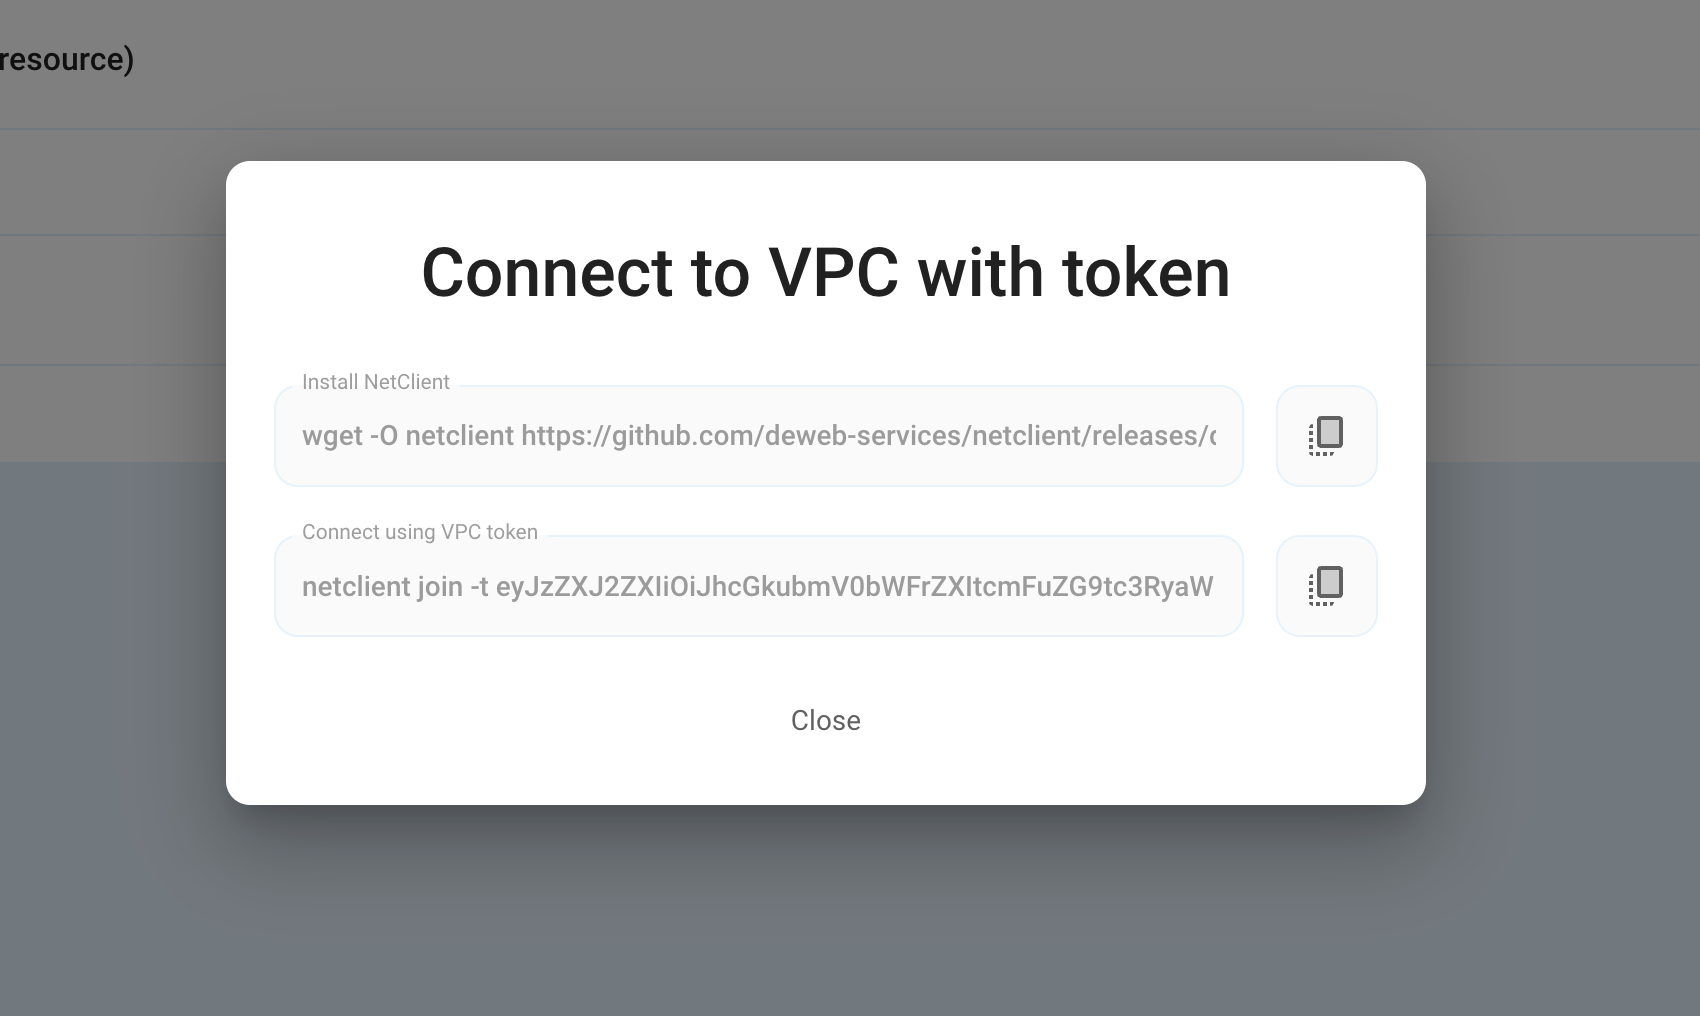
Clicking this icon will open a modal window that provides step-by-step instructions on how to connect an existing VM to your VPC.
Steps to Connect Your Existing VM to a VPC
To successfully connect your existing VM to this VPC, follow these steps:
- Access Your VM via SSH: Connect to your VM using an SSH client.
- Install the NetClient on Your VM: Run the first command provided in the modal window, which installs the required networking client on your VM.
- Join the VM to Your VPC: Execute the second command, which registers your VM with the specified VPC.
After the setup completes, you will see your VM listed as an external resource within the VPC. If necessary, you can easily remove this resource from the VPC through the management interface.
Steps to Connect Your External Existing VM to a VPC
To connect a new VM to your VPC, follow these steps:
-
Initiate Compute Node Creation: Click the + button located in the bottom left corner of the VPC management interface. This action will guide you to the Compute Node creation step.
-
Select the Desired VPC: In the Compute Node creation screen, you’ll notice that the VPC you wish to use is already preselected in the dropdown list. This ensures that the new VM will automatically be connected to the desired VPC once it is created.
-
Complete the Compute Node Setup: Proceed with the configuration and creation of your new Compute Node (VM). Once the setup is complete, your newly created VM will be visible in the VPC’s resource list, displaying all relevant details and confirming that the connection was successful.
Once connected, the new CPU node will be fully integrated into your VPC, enabling secure communication and management alongside other resources within the network.
Managing VPC Resources
Once your VM is connected, it will be recognized as part of the VPC and can be managed like any other network resource. You have the flexibility to monitor, update, or delete the resource as needed, ensuring your VPC environment remains optimized and secure.
This VPC management process empowers you to establish secure, isolated environments tailored to your specific requirements, whether you're deploying single applications or scaling complex, multi-tier architectures.